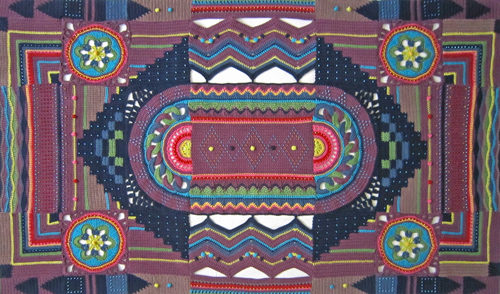
Carousel CAL

The first set of patterns for the Stylecraft Carousel crochet along project were released today and I managed to find the time throughout the day to work my way through the pattern. I am hoping to keep up with the CAL project and blog my way though it, but as show season is on the horizon, with Yarndale just over a week away and the autumn Knitting & Stitching Show just a week or so after that, finding spare time is proving to be a bit of a challenge!


My efforts to keep up with the Lotus Moon Tiles CAL have failed dismally as I have yet to complete all my main motifs (I need to make 20 of them) and still have the squares and triangles to do - I have to admit that part of my failure to keep up is down to the fact that the designer of this beautiful CAL has come up with a really great new colour way so I am now wishing that I had waited before choosing my colours! Polly Plum of Every Trick on the Hook is working through the CAL herself using a really lovely palette of purple, greens and cream shades. If you haven't taken a look at this wonderful pattern yet the link to the Ravelry page is here and you will find a dedicated Facebook group for the CAL here.


So - back to the Carousel CAL!
Designed by Sue Pinner, patterns for this project will be free to download via the Stylecraft web site here. I am working through the Batik version, but the pattern is also written for Special DK.

The first motif will be the central part of the Carousel Blanket. The motif is relatively straight forward, but I did struggle to get the tension right - unfortunately the only measurement given is for the completed motif so I only really knew that I had got it right once I had worked the whole way through and blocked my octagon!

The motif starts with an unusual centre - a padded round of double crochet stitches which was fun to make!


Below is an image after the popcorn round (Round 3) - my motif measured 8.5/9cm at this point.


At the end of Round 5 my motif measured 15cm - that's 6 inches if you are still working in imperial measurements!


After Round 6 there is a note in the pattern to tell you that your motif is likely to form a cup shape for a few rows - mine certainly did, but then it more or less flattened out by the end of the final round.


After Round 9 my motif measured 19.5cm at the widest point and I was beginning to worry that it wasn't going to be big enough as the completed measurement is listed as 30cm.


In the end my completed measurement was a little short at 27.5cm at the widest point, however my motif does appear to have blocked out to 29.5cm so I think I am going to stick with it and not change my hook for a larger one. The pattern doesn't say whether the measurement is pre blocked or blocked, but I am hoping for the latter and looking forward to the next pattern release in a fortnight's time.

If you fancy having a go at the CAL we have a few yarn kits left in stock on the Janie Crow web site, but it is also a great opportunity for using up your bits and bobs from your stash. There are some fabulous colour ways already appearing on the dedicated Facebook group so why not take a look!

Hope you are all healthy and happy!
Janie x


Pattern: Clover Fields Toe Up Socks

Size:
Pattern is written for a size 8 (US) women's foot.

Materials:
Size 1 double pointed needles
1 skein Patons Kroy Socks in Clover Colors (CC)
1 skein Patons Kroy Socks in Flax (MC)
Scrap yarn

Abbreviations:
K - knit
P - purl
Sl - slip unworked stitch from left needle to right needle
SSK - slip unworked stitch from left needle to right needle knitwise. Slip a second unworked stitch from the left needle to the right needle knitwise. Slip those two unworked stitches separately back to the left needle purlwise. Knit those two stitches together in the back of the  stitches (decrease)
K2tog - knit two stitches together (decrease)
P2tog - purl two stitches together (decrease)
Inc - knit into the front and back of the same stitch (increase)

Yo - yarn over


Clover Fields Pattern:
The pattern is written to begin during the toe shaping, then once the toe shaping ends at the first arrow, repeat the pattern between the two arrows. Each square represents one stitch. The MC is in white on the chart and the CC is in black on the chart.

Instructions:
Using the provisional cast on method, cast on 13 stitches
Row 1: P across
Row 2: K across
Row 3: P across


Remove live stitches from scrap yarn and place them on a double pointed needle. You should have 26 sts distributed evenly between four needles, though the first and third needle should have one more stitch each than the second and fourth needle. Begin knitting in the round.

Round 4: *K2, Inc, K until the end of the needle, K across next needle until last 3 sts, Inc, K2.* Repeat from * to * end.

Round 5: Needle 1 - K2, Inc, K across needle
          Needle 2 - K across needle to last 3 sts, Inc, K2
          Needle 3 - K2, Inc, K across needle
          Needle 4 - K across needle to last 3 sts, Inc, K2

Repeat Round 5 until you have 46 sts total.


Round 6: K across
Round 7: Needle 1 - K2, Inc, K across needle
        Needle 2 - K across needle to last 3 sts, Inc, K2
        Needle 3 - K2, Inc, K across needle
        Needle 4 - K across needle to last 3 sts, Inc, K2

Repeat Rounds 6 and Round 7 until you have 74 sts total


Foot: 
Work the Clover Fields Pattern across all needles. Work until the sock is the length from the toe to the bend of your ankle at the top of your foot.

Heel Flap:
Turn so WS is facing and work across Needles 3 & 4 only (leave Needles 1 & 2 unworked and to the side). Work using the MC only. 
Row 1: Sl 1, P across
Row 2: Sl 1, K across


Repeat Rows 1 and 2 ten more times (11 repeats total, or 22 rows).


Row 3: P19, P2tog, P1, turn (leave rem sts unworked) 
Row 4: Sl 1, K3, K2tog, K1, turn (leave rem sts unworked) 
Row 5: Sl 1, P4, P2tog, P1, turn (leave rem sts unworked) 
Row 6: Sl1, K5, K2tog, K1, turn (leave rem sts unworked)  
Row 7: Sl1, P6, P2tog, P1, turn (leave rem sts unworked) 
Row 8: Sl1, K7, K2tog, K1, turn (leave rem sts unworked) 
Row 9: Sl1, P8, P2tog, P1, turn (leave rem sts unworked) 
Row 10: Sl1, K9, K2tog, K1, turn (leave rem sts unworked) 
Row 11: Sl1, P10, P2tog, P1, turn (leave rem sts unworked) 
Row 12: Sl1, K11, K2tog, K1, turn (leave rem sts unworked) 
Row 13: Sl1, P12, P2tog, P1, turn (leave rem sts unworked) 
Row 14: Sl1, K13, K2tog, K1, turn (leave rem sts unworked) 
Row 15: Sl1, P14, P2tog, P1, turn (leave rem sts unworked) 
Row 16: Sl1, K15, K2tog, K1, turn (leave rem sts unworked) 
Row 17: Sl1, P16, P2tog, P1, turn (leave rem sts unworked) 
Row 18: Sl1, K17, K2tog, K1, turn (leave rem sts unworked) 
Row 19: Sl1, P18, P2tog, turn 

Row 20: K across. Split the remaining heel flap sts so there's 10 sts per needle (now Needle 3 and 4). Begin working in the round again.

Round 8: Continue working in Clover Fields Pattern again until the Ribbing at the end. Pick up and K11 sts along heel flap edge on Needle 4; K across Needles 1 & 2; pick up and K11 sts along the other heel flap edge with Needle 3 and K remaining sts on Needle 3. K across Needle 4 to get to the end of the round.

Gusset Shaping: (decrease)
Round 9: Needles 1-2 - K across.
       Needle 3 - K1, SSK, K across.
       Needle 4 - K across until last 3 sts, K2tog, K1.

Round 10: K across.

Repeat Round 9 and Round 10 until there are 74 sts total. 

Continue working in the Clover Fields Pattern until you reach 1/2 inch less than your desired length.

Ribbing:
Rounds 11-14: K1, P1 across.
Bind off loosely.

Find me on Instagram and tag me in your photos! I'd love to see your work. @knitabitcrochetaway

Lotus Moon Crochet Along

I published my first Crochet Along (CAL) project in 2011 after encouragement to do so from my friend knitwear designer Debbie Abrahams who has herself run a Knit Along blanket club for the last 10 years. I have always loved designing CAL projects as I tend to get a bit bored with repeated blocks and love the challenge of adding lots of different elements and techniques to a design.

Crochet Along 2011

Since my first Crochet Club in 2011 crochet along projects have become incredibly popular - indeed my 2 most recent CAL projects, Lily Pond Blanket and Frida's Flowers Blanket have had thousands of participants world wide and my designs are just a drop in the ocean in the world of Crochet Along projects as there are so many fabulous CALs to choose from. My current favourites include Sophie's Universe, which, more than a year on from the launch of the the CAL, has me totally in awe of Dedri Uys's expert stitch construction and the Last Dance on the Beach CAL from Scheepjes.


Despite the fact that I love these designs, there are very few CAL projects that I have the time to work on even though I would love to spend my days working through other designers projects! However in the last few weeks I have fallen head over heels in love with 2 current Crochet Alongs - one is Sue Pinner's Carousel CAL which you can find a link for yarn packs for by following this link. The CAL starts in September (I am planning to follow it using the Batik yarn) and it has a really fun theme of circuses and travelling fun fairs. there are 2 colour ways to choose from, or, as the patterns will be free via the Stylecraft web site you could choose to use up yarns from your stash.


The other project that I am really keen to have a go at is the Lotus Moon Tiles CAL by Polly Plum from Every Trick on the Hook. To join the CAL you need to purchase the wonderfully in depth pattern via Polly Plum's Ravelry page (the link is here). Then you can join the Facebook group, which already has almost 2000 members, to see other people's interpretations of the design and especially really great ideas for yarn colour combinations.


The pattern is written for a Worsted Weight yarn, but I am going to do mine using Stylecraft Special DK and part of the reason I want to work through the whole project is so that we can work out yarn amounts and have dedicated kits on the web site - with the kind permission of Polly Plum of course! The CAL runs until the 19th October with weekly updates on the Facebook page.


I have already worked through one complete main motif using shades from the Stylecraft Special DK range, but to be honest the colours are not totally doing it for me and so I am going to do the blanket in a slightly different choice of shades. Below is an image of the original colour way which I want to emulate. I am happy with my first 2 colour choices - cream and yellow - as I don't think I can go too wrong with these!


The first stage of the CAL and therefore this week's task before the next stage on Monday is to make the first 3 rounds. The original pattern (for Worsted weight yarn) is for 12 main motif, but as my pieces are going to come up smaller because I am using DK weight I am going to make 20. I am also using a smaller hook.

I have sat this evening and worked through a couple of motifs. I need to work through about 3 or 4 a day to keep up with the pace of the CAL so hopefully I will get a little more spare time tomorrow - I am doing a workshop all day so perhaps a can squeeze a few sneaky rounds in during my lunch break? Anyway, I will let you know how I am getting on and will post again about the CAL next week.

Frida's Flowers Pattern Set Eight

So here I am again with the final part of the Frida's Flowers CAL!

After all your hard work crocheting your motifs this set of patterns will probably come as a bit of a relief! It has been amazing to see your near completed projects popping up on social media and I would like to say thank you to everyone who has sent images and lovely emails over the last few weeks - it means so much to know you've enjoyed your Frida's Flowers Crochet Along experience.


When I was thinking about the edging for the project I had lots of big ideas - I thought about little 'Day of the Dead' type skull motifs and love hearts. I envisaged more flowers and elaborate lace, but in the end it occurred to me that the ideal frame for the design should be a simple one so that the flowers became the focus and so I decided to try and emulate the idea of embroidered zig zags which are so common in Mexican textiles. I kind of had in mind the image of sewn ricrac fabric tape.


When you work an edging it is neater to work into stitches themselves rather than into the spaces between stitches, this is especially the case when working into treble crochet (US double crochet).
Working into stitch spaces will accentuate the gaps, so try to work into the post of the stitch instead.


It isn't essential that you achieve the same stitch count as me, but you need to make sure that your repeat works out so that you work 3dc (3sc US) into the stitches at the top of the zig zags - if this means you need to skip an extra stitch somewhere this should be fine.


I think the final round in black really finishes the blanket off nicely, but you could always add more rounds or use a different shade.


So there we go - Frida's Flowers all finished! Here is my version below photographed on the living room floor! 


The image of the blanket below has been sent to me by an amazing crocheter called Lucia - isn't it amazing! I adore Lucia's layout. You can visit Lucia's blog page on Facebook by following this link.


It is always quite sad when a CAL comes to an end and always incredible to think back at how quickly the time has flown. Frida's Flowers has been my 6th crochet along project in as many years - I designed 4 projects using Rowan Yarns between 2011 and 2014 and have designed for Stylecraft for the last 2 years, but now I think it is time for me to move on again and so I am beginning to think about my own CAL design for 2017 - as soon as I have anything concrete to tell you about I will let you know!

In there mean time you may want to check out my Sunshine and Showers Mystery CAL that I have designed for Crochet Now magazine and look out for my new blanket kit project Mexican Diamonds, which will be launched at the end of July. 

I am sure that the guys at Stylecraft have plenty up their sleeves to keep you going through the Autumn so be sure to keep an eye on them too!

I love the challenge of designing the Crochet Along projects and hope that you have all enjoyed your Frida's Flowers experience too. 

Sending you all much love and crochet happiness!
Jane x

Pattern: Striped Cloverleaf Eyelet Socks

These soft cloverleaf eyelet toe up socks are the perfect pair to add to your knit sock collection.

Size:

Pattern is written for a size 8 (US) women's foot, but it is easily adaptable to other sizes. For sizes 6 and smaller, CO 54 sts. For sizes 10 and larger, CO 66 sts.

Materials:

Size 2 double pointed needles
1 skein Berroco Comfort Sock in Color 1822

Gauge: 

44 sts X 32 rows = 4 inches

Abbreviations:

K - knit
P - purl
Sl - slip unworked stitch from left needle to right needle
SSK - slip unworked stitch from left needle to right needle knitwise. Slip a second unworked stitch from the left needle to the right needle knitwise. Slip those two unworked stitches separately back to the left needle purlwise. Knit those two stitches together in the back of the  stitches (decrease)
K2tog - knit two stitches together (decrease)
P2tog - purl two stitches together (decrease)
Inc - knit into the front and back of the same stitch (increase)

Yo - yarn over
Psso - pass the slipped stitch on the right needle over the stitch just worked on the right needle
Striped Cloverleaf Eyelet Pattern:
Row 1: *K2, yo, sl 1, K2tog, psso, yo, P1.* Repeat from * to * until end
Row 2: *K5, P1.* Repeat from * to * until end
Row 3: *K3, yo, SSK, P1.* Repeat from * to * until end
Rows 4-6: *K5, P1.* Repeat from * to * until end
Row 7: *Yo, sl 1, K2tog, psso, yo K2, P1.* Repeat from * to * until end
Row 8: *K5, P1.* Repeat from * to * until end
Row 9: *K1, yo, SSK, K2, P1.* Repeat from * to * until end
Row 10-12: *K5, P1.* Repeat from * to * until end

Instructions:

Using the provisional cast on method, cast on 12 stitches
Row 1: P across
Row 2: K across
Row 3: P across


Remove live stitches from scrap yarn and place them on a double pointed needle. You should have 24 sts divided evenly on four needles. Begin knitting in the round.

Round 4: *K2, Inc, K until the end of the needle, K across next needle until last 3 sts, Inc, K2.* Repeat from * to * end.

Round 5: Needle 1 - K2, Inc, K across needle
          Needle 2 - K across needle to last 3 sts, Inc, K2
          Needle 3 - K2, Inc, K across needle
          Needle 4 - K across needle to last 3 sts, Inc, K2

Repeat Round 5 until you have 40 sts total (10 sts per needle)


Round 6: K across
Round 7: Needle 1 - K2, Inc, K across needle
        Needle 2 - K across needle to last 3 sts, Inc, K2
        Needle 3 - K2, Inc, K across needle
        Needle 4 - K across needle to last 3 sts, Inc, K2

Repeat Rounds 6 and Round 7 until you have 52 sts total (13 sts per needle)


Round 8-9: K across
Round 10: Needle 1 - K2, Inc, K across needle
        Needle 2 - K across needle to last 3 sts, Inc, K2
        Needle 3 - K2, Inc, K across needle
        Needle 4 - K across needle to last 3 sts, Inc, K2

Repeat Rounds 8-10 until you have 60 sts total (15 sts per needle)


Rounds 11-12: K across


Foot: 

Work the Striped Cloverleaf Eyelet Pattern across Needles 1 and 2. Work stockinette stitch across Needles 3 and 4. Work until the sock is the length from the toe to the bend of your ankle at the top of your foot. End after working Needle 4.

Heel Flap:

Turn so WS is facing and work across Needles 3 & 4 only (leave Needles 1 & 2 unworked and to the side), meaning you do not work in the Striped Cloverleaf Eyelet Pattern for the heel flap. 

Row 1: Sl 1, P across
Row 2: Sl 1, K across


Repeat Rows 1 and 2 ten more times (11 repeats total, or 22 rows).

Row 3: P15, P2tog, P1, turn (leave rem sts unworked) 
Row 4: Sl 1, K3, K2tog, K1, turn (leave rem sts unworked) 
Row 5: Sl 1, P4, P2tog, P1, turn (leave rem sts unworked) 
Row 6: Sl1, K5, K2tog, K1, turn (leave rem sts unworked)  
Row 7: Sl1, P6, P2tog, P1, turn (leave rem sts unworked) 
Row 8: Sl1, K7, K2tog, K1, turn (leave rem sts unworked) 
Row 9: Sl1, P8, P2tog, P1, turn (leave rem sts unworked) 
Row 10: Sl1, K9, K2tog, K1, turn (leave rem sts unworked) 
Row 11: Sl1, P10, P2tog, P1, turn (leave rem sts unworked) 
Row 12: Sl1, K11, K2tog, K1, turn (leave rem sts unworked) 
Row 13: Sl1, P12, P2tog, P1, turn (leave rem sts unworked) 
Row 14: Sl1, K13, K2tog, K1, turn (leave rem sts unworked) 
Row 15: Sl1, P14, P2tog, P1, turn

Split the remaining heel flap sts so there's 8 sts on Needle 4 and 9 sts on Needle 3. Begin working in the round again.

Round 13: Pick up and K11 sts along heel flap edge on same Needle 4; K across Needles 1 & 2 in Striped Cloverleaf Eyelet Pattern; pick up and K11 sts along the other heel flap edge with Needle 3 and K remaining sts on Needle 3. K across Needle 4 to get to the end of the round.

Gusset Shaping: (decrease)
For the Gusset Shaping and the rest of the pattern until the end ribbing, work in the Striped Cloverleaf Eyelet Pattern across Needles 1 and 2 and stockinette stitch across Needles 3 and 4.

Round 14: Needles 1-2 - K across in 
Striped Cloverleaf Eyelet Pattern.
       Needle 3 - K1, SSK, K across.
       Needle 4 - K across until last 3 sts, K2tog, K1.

Round 15: Work across in the appropriate pattern for the needle.

Repeat Round 14 and Round 15 until there are 61 sts total, with 15 sts on Needles 1, 2 and 4 and 16 sts on Needle 3. 

Round 16: Needles 1-2 - K across in Striped Cloverleaf Eyelet Pattern.
       Needle 3 - K1, SSK, K across.
       Needle 4 - K across. (60 sts total)


Continue working in Striped Cloverleaf Eyelet Pattern until you reach 1 inch less than your desired length.

Ribbing:
Rounds 17-27: K1, P1 across.
Bind off loosely.

Frida's Flowers - Block Seven

Today sees the release of the final hexagon block motif for the Frida's Flowers Blanket.

This block is placed at the centre and top and bottom edges of the blanket and you will need to make a total of 5 pieces.

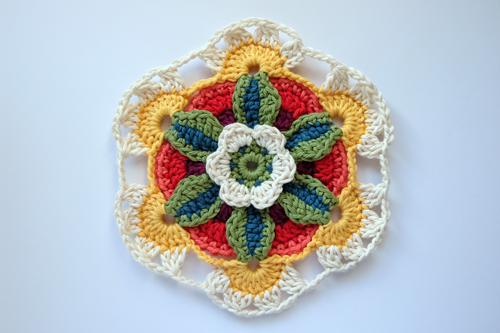
I have called this block Frida's Bouquet as it features small flowers and leaves. It is quite a complicated piece, but is uses all the techniques you will have already got to grips with in other blocks so I am hopeful that you shouldn't find it too difficult.


Once you have completed the central flower you need to work a framework behind it to create the base for the leaves:


You need to work with the Right Side facing you - however the image below is shown Wrong Side facing so that you can see the framework:


You need to create 6 leaves using your darker green shade (the shade names differ depending upon what yarn you are using). Make sure you have 6 leaf bases!


The other side of the leaf is worked using your other green shade - the chain loop at the top will be covered up later on:


The background shades are added over the next few rounds - you will need to work behind the leaves so will need to fold the leaves forward while you are working:


I am so pleased with these motifs - working the chain stitches behind the leaves means that you can achieve a lovely 3D effect which I think really echoes the details of Frida Kahlo's traditional Mexican textiles that she loved to wear.


When I choose a colour palette I almost always include a shade of yellow as it is such a fabulous accent colour. In this design I think the bright yellow shade is key and it really sets off the other shades.


Once all your colourful flowers and leaves are made you need to add the black border:


I feel that the blue bullion stitches add a really nice highlight to the centre of the flower, but of course making these is optional!


I hope you will enjoy making these motifs as much as I enjoyed designing and making them. In a fortnight the final part of the pattern will be available to download. The last set of patterns includes instructions for adding the edging.

Janie x