Pattern: Nautica Striped Cardigan


This busy and colorful striped cardigan will keep you warm during those cold days.

Sizing:
Pattern is written in US women's S (M, L) with standard fitting. The pictures shown are in the Small size.

Gauge:
32 stitches and 42 rows = 4 inches

Materials:
Size 2 circular needles (any cord length)
Size 2 double pointed needles
1 skein Loops & Threads Woolike in Golden Yellow
1 skein Loops & Threads Woolike in Beige
1 skein Loops & Threads Woolike in Ice Blue
1 skein Loops & Threads Woolike in Navy
1 skein Loops & Threads Woolike in Denim Blue
1 skein Loops & Threads Woolike in Chocolate
1 skein Loops & Threads Woolike in Charcoal
Button to match your taste. 6 buttons shown in pictures sized 30mm
Stitch markers
Scrap yarn
Color Pattern:
Left Panel
(6 rows Golden Yellow, 6 rows Beige) repeat 4 times total. 6 rows Golden Yellow.
(10 rows Chocolate, 4 rows Ice Blue) repeat 3 times total. 10 rows Chocolate.
(8 rows Beige, 4 rows Navy) repeat 4 times total. 8 rows Beige.
(6 rows Denim Blue, 6 rows Ice Blue) repeat 3 times total.
(8 rows Golden Yellow, 4 rows Navy) repeat 3 times total. 8 rows Golden Yellow. 2 rows Navy.

Right Panel
(8 rows Navy, 6 rows Charcoal) repeat 2 times total. 10 rows Navy. 6 rows Charcoal. 12 Rows Navy. 6 rows Denim Blue, 10 rows Navy, (6 rows Denim Blue, 8 rows Navy) repeat 2 times total.
(6 rows Golden Yellow, 6 rows Charcoal) repeat 4 times total. 6 rows Golden Yellow.
(8 rows Chocolate, 6 rows Navy) repeat 3 times total.
(8 rows Charcoal, 8 rows Beige) repeat 3 times total.

Note: Avoid holes when changing colors by following this tutorial.

Instructions:
Yoke
In Charcoal, CO 176 (192, 208) sts.
Rows 1-9: K1, P1 across.

Row 10: K1, P1 for 88 (96, 104) sts, pm, K1, P1 for remaining sts. Note: you might want to make this marker a different color than all other markers you use because this marker will be used to differentiate between the left panel of colors and the right panel of colors. This marker will not be used as an increase marker and will be treated as invisible in the pattern from here on out, so just slip the marker when you come to it and know to change colors.

For all rows following until the end edging, work in the Color Pattern of the Left Panel and the Right Panel. The Right Panel should be worked first on the RS until the marker, then the Left Panel should be worked after the marker. Note that the color striping on the Left Panel and the Right Panel do not necessarily line up (that adds to the fun!)

Row 11: P across
Row 12: K across and increase 48 (52, 58) sts evenly along the next row, making sure to have 24 (24, 24) sts on each side of the marker. 224 (244, 266).

Shoulders
(Set Up Row) Row 13: P 33 (36, 40), pm, P 46 (50, 53), pm, P 66 (72, 80), pm, P 46 (50, 53), pm, P 33 (36, 40).

Row 14: *K to two sts before marker, KFB, K1, sm, K1, KFB.* Repeat from * to * three more times, K to end (8 incr total).
Row 15: P across.

Repeat Rows 14 and 15, 26 (32, 38) times total to have 432 (500, 570) sts total.

Row 16: K to first marker, sm, place 98 (114, 129) shoulder sts onto scrap yarn, CO 6 (6, 8) sts, sm, K to next marker, place 98 (114, 129) shoulder sts onto scrap yarn, CO 6 (6, 8) sts, sm, K to end.

Body
With the scrap yarn holding the two sleeves, you should be working only 248 (284, 328) sts.

Continue working in st st until you have completed all of the color changes in the Left Panel and the Right Panel Color Pattern.

Rows 17-26: In Charcoal, K1, P1. Bind Off.

Sleeves
For the sleeves, continue working in the same Color Pattern for the left sleeve in the Left Panel and for the right sleeve in the Right Panel.

Using double pointed needles, pick up and K 3 (3, 4) sts along armpit, pm, pick up and K 3 (3, 4) sts along armpit, pick up and K all other sts sleeve sts on scrap yarn.

Rounds 1-9: work in st st
Round 10: K1, SSK, K until 3 sts before marker, K2tog, K1.

Repeat Rounds 1-10, 18 more times (19 times total).

Rounds 11-37: In Charcoal, K1, P1.

Bind off and repeat for the other sleeve.

Button Edging
Working down the right panel edge, pick up 258 sts evenly.
Rows 27- 31: In Charcoal, K1, P1.

Row 32: K1, P1 for 11 sts, bind off 6 sts, *K1, P1 for 40 sts, bind off 6 sts.* Repeat from * to * 4 more times, K1, P1 until end.
Row 33: K1, P1 for 11 sts, CO 6 sts, *K1, P1 for 40 sts, CO 6 sts.* Repeat from * to * 4 more times, K1, P1 until end.
Rows 34-38: K1, P1.
Bind off.

Working down the left panel edge, pick up 258 sts evenly.
Rows 39-50: K1, P1.
Bind off.

Attach buttons to line up with the button holes.

Wear with pride!

Yarn Stories

If you were at The Knitting and Stitching Show at Alexandra Palace in October then you may have come across a new UK yarn brand called Yarn Stories who launched their new collection of yarns at the show.


I am really excited about this 'new kid on the block' for 3 specific reasons, the first being that the yarns are spun in the UK, the second, that the yarns are outstandingly beautiful and the third, that the brand's focus is on independent designers and cutting edge design.

If, like me, you have a passion for colour then you too will love their palette. The shades are vibrant and rich, with strong colours like deep red and fuchsia, a lovely cobalt blue and a deep dark purple. Because of the quality of the yarn the colours really sing out from the shade card and make me want to knit or crochet with every single one!


If you haven't visited the Yarn Stories web site already then you really do need to take a look - its a great site with lots of interesting stuff to look at - like the story behind the making of the brand, sourcing the yarns, choosing the palette and designer profiles as well as behind the scenes images and stories.


The current design collection features stories such as 'Grace' and 'Metroscape', 'Pioneer' and a 'Gifted' story which is appearing over the next few days ready download in time to make special gifts for Christmas.
There are some really lovely garment patterns ready for download from the site, but of course it is the blanket and cushion designs which get me the most excited. The cushion below is by Sasha Kagan:


The 3 cushion covers above have been designed by Amanda Crawford. I think these are just great and I really love the stitch detail - the herringbone one looks like a woven fabric don't you think?

The blanket below will be my first design to feature within the collection. It's called Rothko and the pattern will be available to download from next Tuesday within the 'Gifted' story via the Yarn Stories web site.


If you want a bit of fun you could choose to make Peter and Percy - designed by Eline Oftedal. I think these are really fab and look pretty easy to do.


If you're a fan of Facebook and Twitter then you should definitely follow the yarn brand as they do lots of giveaways and competitions. I would also suggest you get yourself a shade card. The yarn is available on line only at the moment and choosing yarn shades on the internet can be difficult, especially as colours on screen are always more blue than they are in reality. Having a shade card to hand when choosing your yarn means you won't be disappointed with your colour choice when your yarn parcel arrives in the post.

If you have a little spare time during the madness that is the last few weeks before Christmas and you fancy a quiet cup of tea and a peruse of the internet, then I think you should make your first stop the Yarn Stories web site, problem is that you might well end up spending a little more time and a little more money than you thought!

Christmas is coming…..

Every single year Christmas creeps up on me out of nowhere! It doesn't seem like more than a couple of weeks ago that I sat and looked at the diary and counted 12 weeks until Christmas and now here we are with just over 4 weeks to get everything sorted and ready for the big day!

I love Christmas and always plan to do far too many things in the lead up to it, most of which never materialise, but this year I have been a bit organised and managed to sort out a crochet bauble pattern and a step by step blog posting for making a really easy pom pom wreath.

Last year I designed the Blitzen Bauble which sold really well at shows, but posting the plastic bauble proved a little hazardous as many of them broke, so this year I have designed a project that can be fitted over an existing bauble, which are available very cheaply. You can download my new crochet bauble pattern by following this link:


I really love the Anthropolgie stores and could spend hours wondering around inside the Regent St store or the shop on the Kings Road. I have quite a few quirky bits and bobs around my house which have come from the store, but I tend to buy things when they are on sale as the retail prices tend to be pretty steep. Anthropologie always have some really lovely Christmas decorations and I particularly like those that appear hand made. Below are some images of some of their current stock of decorations:


Whilst perusing their store on line recently I came across these wonderful pompom wreaths, but with a price tag of £118 I knew they were way out of my budget. 


Pom poms are incredibly easy to make, especially with some of the new Clover Pom Pom Makers and they are a great way of using up bits and bobs of old yarn, so I decided it couldn't be too hard to make my own version of the Anthropologie wreath. I'm really pleased with the results and thought it would make a great blog tutorial - so here goes!

You will need a selection of yarns - I used various brands and weights because I wanted to have different textures and shades within the mix of cream pom poms. This project is quite yarn hungry so make sure you have plenty. You will also need a polystyrene wreath form - I got mine from Hobby Craft. There is a great choice on their web site - I bought the 300mm size for £3.


The first thing I did was make the pom poms. I made 2 sizes using the 'Small' size Clover Pom Pom Makers (there are 2 in a pack). 


Each pom pom needs to be trimmed into a nice shape and you will need more than you think!


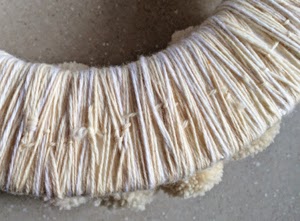
Using a few strands held together, wrap the yarn around the polystyrene ring.


Using a knitters sewing needle sew the pom poms in place on the front of the wreath form, sewing through the wrapped yarns and securing at the reverse. I used a Clover Chibi needle as it has a slightly bent end which makes sewing at unusual angles much easier.


Once you have filled three quarters of the wreath, make a hanger by crocheting a chain long enough to loop around the wreath and tie or sew in pace to form a loop. Again I used a few yarn strands held together. 


Sew the remaining pom poms in place, making sure you don't have any gaps. Below is an image of my completed wreath: 


Below are some more wreath ideas from Anthropologie, I particularly like the one with wraps of brightly coloured yarn called Cozy Kindling Wreath


You can use pom poms to decorate your Christmas Tree or create a pom pom garland. The cream garland is from Anthropologie, as is the ready made pom pom braid below:


John Lewis have some great pom pom related stuff in store too, such as the multicoloured bauble below and the fab pom pom tree topper.


I have another polystyrene wreath form and hope to make a multi coloured wreath over the next few weeks. If I do manage to do it I will put the images on the blog, but for now I am going to have a few days rest from making pom poms! 

Weekend Workshop with Debbie & Jane

Last September Andy and I were invited to a friend's wedding in Bournemouth. We booked a last minute hotel room and headed down to the seaside for what turned out to be a really wonderful wedding reception at a hotel that over looked the sweeping bay. The weather was wonderful and the views out to sea and across the Dorset coast were beautiful. At the end of a wonderful evening we headed back to our room full of the joys of a lovely late summer wedding day.

Caught up in the wedding fever of the previous day we had barely taken the time to look at the hotel we were staying in. We had thought it nice enough, but as we walked down to breakfast on the Sunday morning we noticed just how nice the hotel was. With friendly staff, a contemporary light bar area and a stunning pair of function rooms to the front of the hotel with sea views, we thought what a wonderful venue the hotel would be for a knit and crochet workshop weekend.


When we were checking out of the hotel we asked the duty manager about the function rooms and, even-though he was about to finish his shift, he put his tie back on and showed us around all the Hotel amenities and the various function rooms. We were really excited by what the hotel had to offer and when we got home Andy rang and spoke to the events manager Nicki who told us about the various packages we could book at the hotel. 

By now we were really excited by the prospect of a weekend workshop at the hotel so we spoke to Debbie Abrahams and her husband Steve about our idea and they got excited too!

We booked the hotel for the first weekend in November and launched the workshop via our web site in February to allow plenty of time between then and the workshop date to get the bookings. To our amazement the 26 rooms we had been allocated by the hotel sold out in the space of 3 days and we were able to secure the Bay Suite at the front of the hotel as our workshop room.


When Debbie and I first discussed the idea of the weekend workshop we decided that we wanted to offer participants the chance to have a proper weekend away with a few treats built in and of course some time for walks or a spot of retail therapy. With this in mind Andy and Nicki built a package that included all meals and refreshments, a spa pass and a visit to the Russell Cotes museum and gallery which is situated opposite the hotel.

A few weeks ago, after months of preparation, Debbie, Steve, Andy and myself headed down to Bournemouth for our first weekend workshop. I think we all felt really excited and nervous at the prospect of hosting our very own workshop weekend, but we were soon made to feel calm and collected upon our arrival at the hotel and we set about setting up our workshop room.


Debbie and I had designed a Christmas themed workshop project and we were supported by the new Yarn Stories brand who had made up lovely yarn packs for each of the participants. 


Our workshop participants arrived in time for a bucks fizz reception on Friday evening followed by a lovely evening meal and soon we were relaxed and happy and fully into the swing of what was to turn out to be a very successful weekend.


I really like Bournemouth and the views from the hotel are pretty cool! Despite changeable weather we managed to get some lovely pictures of the beach. If you look closely you can see the surfers in the sea by the pier - I was amazed to see them in the sea in November!


Our weekend went by really quickly and, once the workshop was over, we were sad to be leaving the hotel on the Sunday afternoon. The Hotel staff had been amazingly helpful and friendly and our workshop participants had been a really great group. We had all had a wonderful time meeting fellow guests within the Hotel too - there were 2 large groups of dancers attending events in the hotel at the same time as us, but unfortunately we had to pack our bags and head home!


After the success of our first weekend workshop we are already in the throws of organising another one at the same Hotel next year, so do keep an eye on the web site for more information.