Pattern: Reversible Diamond Cowl


I'm so excited to have this pattern featured by Yarnthology, a wonderful website committed to carefully selecting yarn brands based on how they treat people, animals, and the environment. You can find a more printer friendly version of this pattern on their blog

Materials:
Size 7 (US) circular needles
2 skeins Malabrigo: Rios in Natural
2 skeins Malabrigo: Rios in Teal Feather (you can purchase the beautiful yarn here).
Stitch markers

Gauge:
4 x 4 inches = 26 rows x 17 sts

Finished Measurements:
70 inches (circumference) x 11 inches

Abbreviations:
K – Knit
P – Purl
SSK – slip the first stitch as if to knit, slip the second stitch as if to knit, then slide the left needle into the front of both slipped stitches and knit them together

Overview:
This cowl uses double knitting and has a diamond pattern colorwork on 2/3 of the cowl and solid colored broken seed stitch on the remaining 1/3 of the cowl. The colorwork looks complicated, but it’s quite repetitive and easy to memorize so you don’t have to constantly glance at the chart.
Pattern Notes:
The Main Color (MC) is Natural and the Contrast Color (CC) is Teal Feather. In double knitting, you work using both the MC and CC.

For the written instructions below, you work two consecutive stitches for one stitch in the pattern. For the pattern chart below, each block represents two consecutive stitches. For example, if the pattern calls for you to knit the next stitch, then knit the next stitch in the indicated color while both strands are held to the back, and purl the next consecutive stitch in the opposite color while both strands are held to the front.

The chart is read right to left starting at the bottom right corner.
Chart Key:

 Knit in MC


Knit in CC

Instructions:
CO 199 sts using MC only. Place markers after 140 sts and at the beginning of the round.

Set up row: Begin knitting in the round. In each stitch, K with the MC and P with the CC in the same stitch. This will double the number of stitches on your needles to 398.

Round 1: Work across first 280 sts, until marker, following the colorwork chart. Slip marker, *K1, P1* to last stitch, K1, slip marker.
Round 2: Work following the colorwork chart until marker, slip marker, K across to end marker, slip marker.
Round 3: Work following the colorwork chart until marker, slip marker, *P1, K1* to last stitch, P1, slip marker.
Round 4: Repeat Round 2.

Repeat Rounds 1-4 until you have worked all lines in the colorwork chart and have five rows of diamonds.

Bind off using MC only. *SSK the first two stitches together, SSK the next two stitches together, pass the first SSK stitch over the second SSK stitch on the right needle* until the end.


Find me on Instagram and tag me in your photos! I'd love to see your work. @knitabitcrochetaway

Pattern: Double Seed Shawl

Size:
62 inches long (tip to tip) X 19 inches wide (down longest center point)

Materials:
1 skein Caron Cakes in Cookies & Cream
Size 6 needles

Abbreviations:
K - knit
P - purl
SSK - slip unworked stitch from left needle to right needle knitwise. Slip a second unworked stitch from the left needle to the right needle knitwise. Slip those two unworked stitches separately back to the left needle purlwise. Knit those two stitches together in the back of the  stitches (decrease)

Yo - yarn over

CO - cast on
St(s) - stitch(es)
Instructions:
To prepare your yarn and make sure the colors are distributed evenly throughout the piece, make sure the starting color of the yarn is the same length as the ending color of the yarn. If the starting color is longer than the ending color, then cut the starting color down until it is the same length as the ending color.

CO 3
Row 1: P across
Row 2: K2, yo, K across
Row 3: P across

Increase Rounds:
Row 4: K2, yo, *K1, P1.* Repeat from * to * until end
Row 5: *K1, P1.* Repeat from * to * until last 3 sts, P across
Row 6: K2, yo, *K1, P1.* Repeat from * to * until last st, K1
Row 7: *P1, K1.* Repeat from * to * until last 3 sts, P across 

Repeat Rows 4-7 until piece measures approximately 19 inches wide, or your desired width for the point of the triangle. For the picture, I found the color of the yarn that was in the middle of the skein, then found the middle of that color before I started working it and placed a marker. When I reached the marker, I began the decrease rounds below, which makes the triangle point in the dead center of the center color yarn. Alternatively, if you want to have the triangle point at a color change, then begin the decrease rounds below when the colors change in the yarn.

Decrease Rounds:
Row 8: Ssk, K1, yo, ssk, *P1, K1.* Repeat from * to * until last st, P1
Row 9: *K1, P1.* Repeat from * to * until last 3 sts, P across
Row 10: Ssk, K1, yo, ssk, *P1, K1.* Repeat from * to * to end
Row 11: *P1, K1.* Repeat from * to * until last 4 sts, P across

Repeat Rowa 8-11 until you only have 5 sts remaining
Row 12: Ssk, K1, yo, Ssk
Row 13: P across
Row 14: Ssk, K across
Row 15: P across

Bind off

Quick Cable Slouch Hat


Materials:
Size 8 double pointed needles
Size 11 double pointed needles
1 skein The Piper's Twist
1 cable needle

Instructions:
Free pattern available here.

I followed these instructions as written and they were really easy to follow. It's a great hat to finish in one night!

Stylecraft Blog Tour - Playing with Colour

Over the past month we have been up to our necks in show season - Yarndale was once again an amazing (and bonkers) experience and this was followed by another incredible week at The Knitting & Stitching show here in London. Doing shows and workshops is a really rewarding experience for me as a designer and I love meeting fellow crochet enthusiasts and chatting to people about their love of crafts. One of the most common questions and comments we get at shows in particular is in relation to colour, with people often asking how I choose shades for a design or how I make a palette that works, so I thought I would use this post, which is the second of a series of posts in the Stylecraft 'Blogstar' series, to talk to you about colour……


Colour is a very personal thing, but for me playing with colour is possibly the aspect of crochet designing that I enjoy the most. I love the complicity of making designs work mathematically and logically and coming up with good stitch combinations too, but in the end it is the colour combinations that I think really decide whether or not a design is going to work.

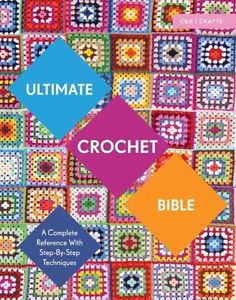
I have said many times that I am not a fan of granny squares and I don't really get this whole craze for regurgitating existing crochet designs such as granny squares or chevron patterns over and over again in varying 'new' colour combinations, but this is because I really enjoy a technical challenge and therefore don't really want to design 'easy'. I try and design in a way that creates a new interest on every round or row, partly because I get bored easily (5 or 6 repeated motifs is my maximum) and because I want to give other crocheters something to really get their teeth into. All this said, the thing I do love about a granny square is the fact that it can allow you to really play with colour and they can be a fun mindless way to come up with a colour palette. The new soft back cover of my book The Ultimate Crochet Bible has a lovely mix of Granny Squares on the cover:


My Great Grandmother was an avid crocheter - she learnt to make Granny Squares in her 70s and she lived to 98, so she had nearly 30 years of Granny Square making! I remember sitting by her side while she chose her yarn shades and laid out her blanket squares (of which she must have made literally thousands) ready to make her blankets. My Great Aunt used to say that my Nanna quite simply had an absolute love of yarn and colour, so I am guessing that is where I get it from! The image below shows one of Nanna's lovely blankets folded with some of my own projects.


When I start working on a new design I rarely make an absolute decision about yarn shades before I start - I tend to gather a large palette and pick and choose shades from it as I work through a design. 8 shades is probably an average choice for me; some designs could stretch to as many as 12, but this could mean lots of left over yarn if the design becomes a blanket or cushion project, so I need to keep an eye on how much of each yarn is used. I tend to pick one really dark shade and one really light shade, then a couple of mid tone shades and a couple of bright zingy shades and then I go from there. The palette for the Blog Stars tour was chosen by the guys at Stylecraft and we had the choice of 2 colour ways of Special Aran - I chose 'Recipe 2', which includes 1 ball of each of the following shades:

Empire 1829
Gold 1709
Pale Rose 1080
Parchment 1218
Pistachio 1822
Pomegranate 1083
Saffron 1081
Sage 1725
Spice 1711
Storm Blue 1722


Emma Varnam kicked off the Blogstar tour yesterday with her blog about her lovely Blencathra Blanket which uses the alternative pack of colours pictured below. Both yarn packs are available through Stylecraft stockists and we will have a limited amount of stock on the Janie Crow web site.


When I work on a blanket design, especially the more complicated CAL designs, I tend to end up with a lot of left over ideas and motifs that didn't make it into the final design. As the colour palette for the Blog Tour had already been decided for me I thought it would be a good idea to use a hexagon motif that didn't make it into the final Frida's Flowers blanket to play around with colour combinations. For almost all of my projects I design the motifs and stitch variations from scratch, rarely referring to stitch libraries or the work of other designers. I do this for my own sanity (as I said before I am the type of person who constantly needs to challenge my brain) and because I don't really see the worth in simply recolouring existing designs.

I am going through a very definite orange phase, so the first shade I was drawn to when I opened my yarn pack from Stylecraft was 'Spice'. A customer recently told me she hated orange and that she would never buy a design with it in, but I think it is a fabulous colour and can really make a colour palette work. My first motif used Spice in 2 rounds with Parchment as the edging. You can see the progression of my yarn choices on each of my repeated blocks below and the pattern is posted with step by step images further down the post.

Block 1
I was relatively pleased with this motif, but felt that there was too much orange in it - despite my new found love of the shade!

Block 2
For Block 2 I swapped the shades around completely and left one shade out. I like this block, but maybe the light pink shade (Pale Rose) gets a little lost and merges into the outside edge shade (Parchment).

Block 3
Using the dark pink (Pomegranate) in place of the Pale Rose made Round 9 stand out far more, but I began to wonder about my choice of Parchment for the final 2 rounds, so for the next block I swapped in Gold for Rounds 10 & 11 and changed the other shades around again too!

Block 4
I like Block 4! I like all the blocks for different reasons, but in this one I really like the subtlety of the light green (Pistachio) after the blue shades of the central flower.

Block 5
For Block 5 I swapped the shades around so that the central flower had the pink shades and the outer flower had the greens and blues.

Block 6
When I completed Block 6 I was really happy with the colours. I really like the green flower in the middle and the pink to red shades in the outer rounds, however I then decided that I had totally overlooked one of the other colours in this pack - Storm Blue (one of my all time favourite shades in the Stylecraft range), so I decided to do my seventh block in the same shade order as Block 6 only with Gold and Storm Blue swapped over. This is the also the block that I used for the step by step images. It is shown below surrounded by the other blocks:

Block 7
My motif has 11 rounds and there are 10 shades of Aran in the Special packs so this is a great motif for playing! I had to stop after 7 blocks purely because of time restraints, but it is incredibly tempting to start more and more blocks!

If you would like to make your own block the motif pattern is below:

Diego's Flowers - Crochet Hexagon Motif

Using your choice of shade of Special Aran and a 5mm hook make 5ch, join with a ss to form a ring

Foundation Round: 1ch, 12dc into ring, ss to join, fasten off. (12 sts)

Round 1: Using your next choice of yarn shade join yarn into any stitch by working 1ch + 2ch (counts as 1tr), 1tr into same st, 2tr into each st to end, ss to join, fasten off. (24sts)

Round 2: Using your next choice of yarn shade join yarn into any stitch by working 1ch + 2ch (counts as 1tr), 2tr into same st, 1ch, skip next st, * 3tr into next st, 1ch, skip next st; repeat from * to end, ss to join, fasten off. (36sts)


Round 3: Using your next choice of yarn shade and working in front of the previous round join yarn into any skipped stitch by working 1ch + 5ch (counts as 1tr & 3ch), 1tr into next skipped st, 3ch; repeat from * to end, ss to join, fasten off.


Round 4: Using your next choice of yarn shade and working into sts made on Round 2 and at the same time working over the top of the ch made on the previous round join yarn into the top of the 1st tr of any 3tr group made on Round 2 by working 1ch + 2ch, tr2tog over next 2sts, 4ch, skip tr made on previous round, * tr3tog over next 3sts made on Round 2 as before, 4ch, skip tr made on previous round; repeat from * to end, ss to join, fasten off.


Round 5: Using your next choice of yarn shade join yarn into any ch sp by working 1ch + 2ch (counts as 1tr), 4tr into same ch sp, 1ch, * 5tr into next ch sp, 1ch; repeat from * to end, ss to join, fasten off. (60sts)


Round 6: Using your next choice of yarn shade join yarn into any 1ch sp by working 1ch (does not count as a st) 1dc into same ch sp, * 1ch, [1dc into st sp between next 2tr, 1ch] 4 times, 1dc into next ch sp, 5ch, skip 5tr, 1dc into next ch sp; repeat from * to end omitting 1dc on final pattern repeat, ss to join, fasten off.

Round 7: Using your next choice of yarn shade join yarn into next 1ch sp (or equivalent ch sp between 2dc on another part of the motif) by working 1ch (does not count as a st) 1dc into same ch sp, * 1ch, [1dc into st sp between next 2tr, 1ch] 3 times, 1dc into next ch sp, 6ch, skip 5ch & 1dc, 1dc into next ch sp; repeat from * to end omitting 1dc on final pattern repeat, ss to join, fasten off.


Round 8: Using your next choice of yarn shade join yarn into next 1ch sp (or equivalent ch sp between 2dc on another part of the motif) by working 1ch + 2ch, tr2tog into same ch sp, 3ch, [tr3tog into next ch sp, 3ch] 3 times, * 1dc into next ch sp working over ch made on previous 2 rounds at the same time, 3ch, ** skip 1dc, [tr3tog into next ch sp, 3ch] 4 times; repeat from * to end, finishing last repeat at **, ss to join, fasten off.


Round 9: Using your final choice of yarn shade join yarn into central ch sp made between 2 clusters on previous round by working 1ch (does not count as a st), 5dc into same ch sp, * 4dc into next ch sp, [3dc into next ch sp] twice, 4dc into next ch sp, 5dc into next ch sp; repeat from * to end, omitting 5dc on the final pattern repeat, ss to join, DO NOT fasten off. (152sts)

Round 10: 1ch (does not count as a st) 1htr into next st, * 3tr into next st, 1htr into each next 3sts, 1dc into each next 3sts, 1htr into each next 6sts, 1dc into each next 3sts, 1htr into each next 3sts; repeat from * to end, omitting 1htr on final pattern repeat, ss to top of 1st htr to join, fasten off.


So, with 7 blocks under my belt I am beginning to feel like I am getting somewhere with the colours!

I really like the Storm Blue edge on Block 7 and like how it works with the Gold edging on the other blocks. I think it would be fun to make this a blanket project and I have a feeling there is possibly enough yarn within the 10 ball pack to make at least 20 motifs, so long as the shades are jiggled around a bit. If I have time I will play with this a little more, but in the mean time it would be great to see some of your colour combinations, so do send them as messages to the Janie Crow Facebook page or email them to mail@janiecrow.co.uk, alternatively you can send them to one of the Stylecraft Facebook groups.


If you would like to win a pack of Stylecraft Special Aran in the shades I have used follow this link to enter the competition. 

The Stylecraft blogtour runs for the next 2 weeks and you will find dedicated blog posts from many fabulous people such as:

Heather at The Patchwork Heart
Sue Pinner
Sandra at Cherry Heart (you must also check out her beautiful Bali Wrap project here)
Sarah at Annaboo's House
Heather at Keep Calm and Crochet on (who will be the Blogstar tomorrow)
Angie at Le Monde de Sucrette
Phil at The Twisted Yarn
Julia at Handknitted Things
Kathryn at Crafternoon Treats.

Wow! What a lot of awesomeness Stylecraft and the Blogstars have in store for you over the next few weeks! Make sure you find the Blogstar of the day every day to see all the fabulous free projects they have in store for you and to be in with a chance to win a yarn pack every day.

Have fun!
Janie x

Shortie Socks


I fell in love with this adorable pattern and its pictures, but I was concerned that the sock would slip off because the ankle is so low. I was pleasantly surprised at how well it stays on and I will definitely be making more of these!

Materials:
Size 1 double pointed needles
1 skein Premier Yarns Wool-Free Sock in Grapes

Instructions:
Easy to follow instructions available here.

Decathlon Socks

Materials:
Size 1 double pointed needles
1 skein Trekking XL in color 602

Instructions:
Free pattern available here. I wanted my socks in a size 8 women's (US), but I found with the yarn I used that I needed to knit the largest size of this pattern. 

The socks are pretty long following the pattern but they are so cozy. I usually like to make toe up socks, but I find the toe on these socks is snug and feels secure.

Delft Blanket and Willow Blossom

I have wanted to design a project based on Delft pottery for a long time and so today I am really pleased to be able to tell you about 2 new patterns which are hot off the press! The projects are both blankets - one is quite large and is called Delft Blanket and the other is a cot blanket called Willow Blossom.


I remember lots of blue and cream pottery from my childhood so it has always brought back nice memories and then a few years ago lots of Delft Ware inspired items began to crop up on the catwalks and I really fell in love with dresses like these below by Preen.

Preen Pre Fall 2012
Preen Pre Fall 2012

Around about the same time (2012/13) blue and cream pottery inspired knitwear began cropping up too. If you have never seen Persian Dreams by Jenise Hope then prepare to be amazed at it's beauty - the original is multicoloured, but there are some amazing blue versions around like this one below:

© liesbraam

When I was a child we would often visit my elderly Auntie for afternoon tea and were used to seeing the 'Willow Pattern' on sandwich plates and tea cups. The Willow Pattern featured an elaborate chinoiserie pattern that was popular towards the end of the 18th Century. Despite having an oriental style of design, china featuring the Willow Pattern originally came from Stoke On Trent in the UK, but a lot of pottery featuring the design also came from India via the East India Company.

Check out these Willow Pattern inspired socks by Lisa Grossman. They are called Willow Ware and you can see images of them on Ravelry. Lisa sadly passed away last year, but you can still see all her amazing sock designs on line.

© Tsarina of Tsocks


Delftware from The Netherlands, which also features cream and blue designs, was in existence far earlier than it’s Stoke On Trent counterpart. Delftware often features flowers and birds and is famous for it’s quality and intricate designs. 

As I already said I have wanted to use Delftware as the inspiration for a crochet design for a while, but until now it wasn’t easy to find enough good shades of blue within a yarn range, so I was really pleased to see so many blues make an appearance in the Millamia range. This beautifully soft Merino yarn, with it’s slightly matt appearance and quality feel is just perfect for the design and I am so pleased with the outcome of these blankets.


The patterns for Delft Blanket and Willow Blossom are available to download via our web site and via the Love Crochet web site where you will also find a yarn pack for the Delft Blanket and the Willow Blossom Cot Blanket to accompany the design. Love Crochet have very kindly offered a fabulous reduction on the retail price of the yarn if you purchase the packs - you will get a 10% discount on the Willow Blossom pack and a whopping 25% discount on the Delft Blanket pack - yay!

Both blankets will be on display at The Knitting and Stitching Show at Alexandra Palace next week so if you are planning to come along do pop onto our stand to take a look - we will be in the Textile Gallery this year and our stand number is TGD10.


Sunshine & Showers

For the last 6 months I have been designing and making a blanket project for the new Crochet Now magazine. The blanket is a mystery crochet along project, the patterns and tutorials for which feature monthly in the magazine. The blanket is made sampler style in that it is made in continuous rows and not as motifs which are put together. I have named the blanket project Sunshine and Showers as it is based from month to month on the weather here in the UK.

Sampler blankets are a great way to learn new techniques and of course can be really lovely to make and consequently own. You can find some great sampler blankets on Ravelry, such as 'As we go Stripey Blanket' by Hannah Owens pictured below - as you can see it is stunning in lots of colours and just a few - the red version is so Christmassy isnt it!

Image © Hannah Davis
© Crealyt

Another example of a sampler blanket is shown below - this one is by Kirsten from Haak Maar Raak. This is an absolutely stunning blanket and it is a free pattern that you can find by following the link here. The blanket uses 34 balls of Stylecraft Special DK so it is quite an undertaking, but I am sure you will agree that the blanket is totally gorgeous!

© Haak Maar Raak
© Haak Maar Raak
Another really lovely sampler blanket is called Spice of Life and it was designed by Sandra of Cherry Heart. This crochet along project was released by the lovely guys at Black Sheep Wools last year - unsurprisingly I think they had thousands of people do the project with them!

© Cherry Heart
© Cherry Heart
So - as you can see there are already some really lovely sampler blankets already out there in crochet land so I wanted to design something that was a little different and had a design theme, hence the fact that I made my version a seasonal CAL. When I design things these days I almost always have a mood board or design theme in mind before I start, partly so that I don't get distracted and end up doing something completely off piste! When designing the CAL I also wanted to design it in a way that would appeal to those relatively new to crochet so that they could build on their skills and learn new techniques.

The first part of the Sunshine and Showers crochet along project was published in the May edition of the magazine (The 1st edition in April featured a 'Getting Ready' article). As May is pretty much the turning point between spring and summer it was a good place to start and I designed the first piece of the blanket to reflect the rolling hills and lush grass of the British countryside.


I chose 15 shades of Stylecraft Special DK for the project and yarn packs are for sale on the Janie Crow web site, although I know that lots of people are using the project as a lovely stash busting exercise!

For June I wanted to capture the idea of small emerging flowers in the garden so came up with a design that uses puff stitches to create flower shapes.


For July it was (predictably) all about the sunshine and so I designed a section that I hoped would emulate the sun setting (or rising) on the horizon.


For August I wanted to create the edging for the blanket as I thought it would be lovely to have a pretty flowery border. It is a little bit time consuming to create this edging in different shades of yarn - but I really love the outcome.


To this point the blanket was made in 2 sections - so each pattern was worked through twice to create 2 pieces. I designed it in this way so that the blanket will match at both ends from the centre outwards, but also because I wanted the darker shades of autumn and winter to be at the middle of the blanket, so for September I started a new strip and based the design on idea of the last flowers of the summer sitting amongst the wooden trellis fencing in the garden.


That brings me up to date for the first 5 months of the crochet along project. As I said already the patterns are published monthly in Crochet Now magazine. Past issues are available, except for Issue 3 which is only available in download form. You can find more info by browsing the magazine web site here.


As this is a mystery crochet along I cannot show you anything more of the design except a sneaky peek of October which is above - I based the design on a field of pumpkins ready and waiting to be picked for Halloween! I am a massive fan of crochet bobbles so this was an absolute must for me!

I am looking forward to showing you what the next 6 months have in store and hope that you might join me on the mystery crochet along at some point - its not too late to join in - you cold always start with the September patterns and work through to next summer…..